 |
| It has rained most of the day but the sun is out now and this image proves it!!! |
Showing posts with label Module One. Show all posts
Showing posts with label Module One. Show all posts
Tuesday, 1 May 2012
Module One - mounted resolved sample
Monday, 30 April 2012
Module One - completion details
 |
| My workbook - books I own or have borrowed for this module |
 |
| My workbook - Health & safety 2 |
 |
| My workbook - Health & safety 1 |
 |
| My workbook - Storage of work etc |
 |
| My workbook - Costings & time log |
 |
| My workbook - evaluation of resolved sample |
 |
| Working at my machine |
Friday, 27 April 2012
Chapter Eleven - Resolved Sample
 |
| Resolved sample - image 75 |
I chose hand dyed
felt as a background and sewed it together with antique stitch. Thinking about the design brief I chose
different sized stars and chose a sheer which I planned to burn back with a
heat gun showing disintegration. The
final design shows 4 abstract stars:
one stitch only
one appliqué layering from the top & cutting outside stitching
one appliqué layering from underneath & cutting inside stitching & trupunto one was seed stitching in similar colours to the background to show disintegration.
one stitch only
one appliqué layering from the top & cutting outside stitching
one appliqué layering from underneath & cutting inside stitching & trupunto one was seed stitching in similar colours to the background to show disintegration.
To join the stars
together was a large appliqué star with stitching & beads. Finally I did free machine stitching
following the shapes of the stars before using the heat gun.
 |
| Resolved sample - before heat gun |
 |
| Resolved sample - early stage |
 |
| Resolved sample - image 74. Design using coloured papers |
 |
| Resolved sample - image 73 - star stitches chosen from Constance Howard's Book of Stitches |
 |
| My workbook - image 72 |
 |
| My workbook - image 71 |
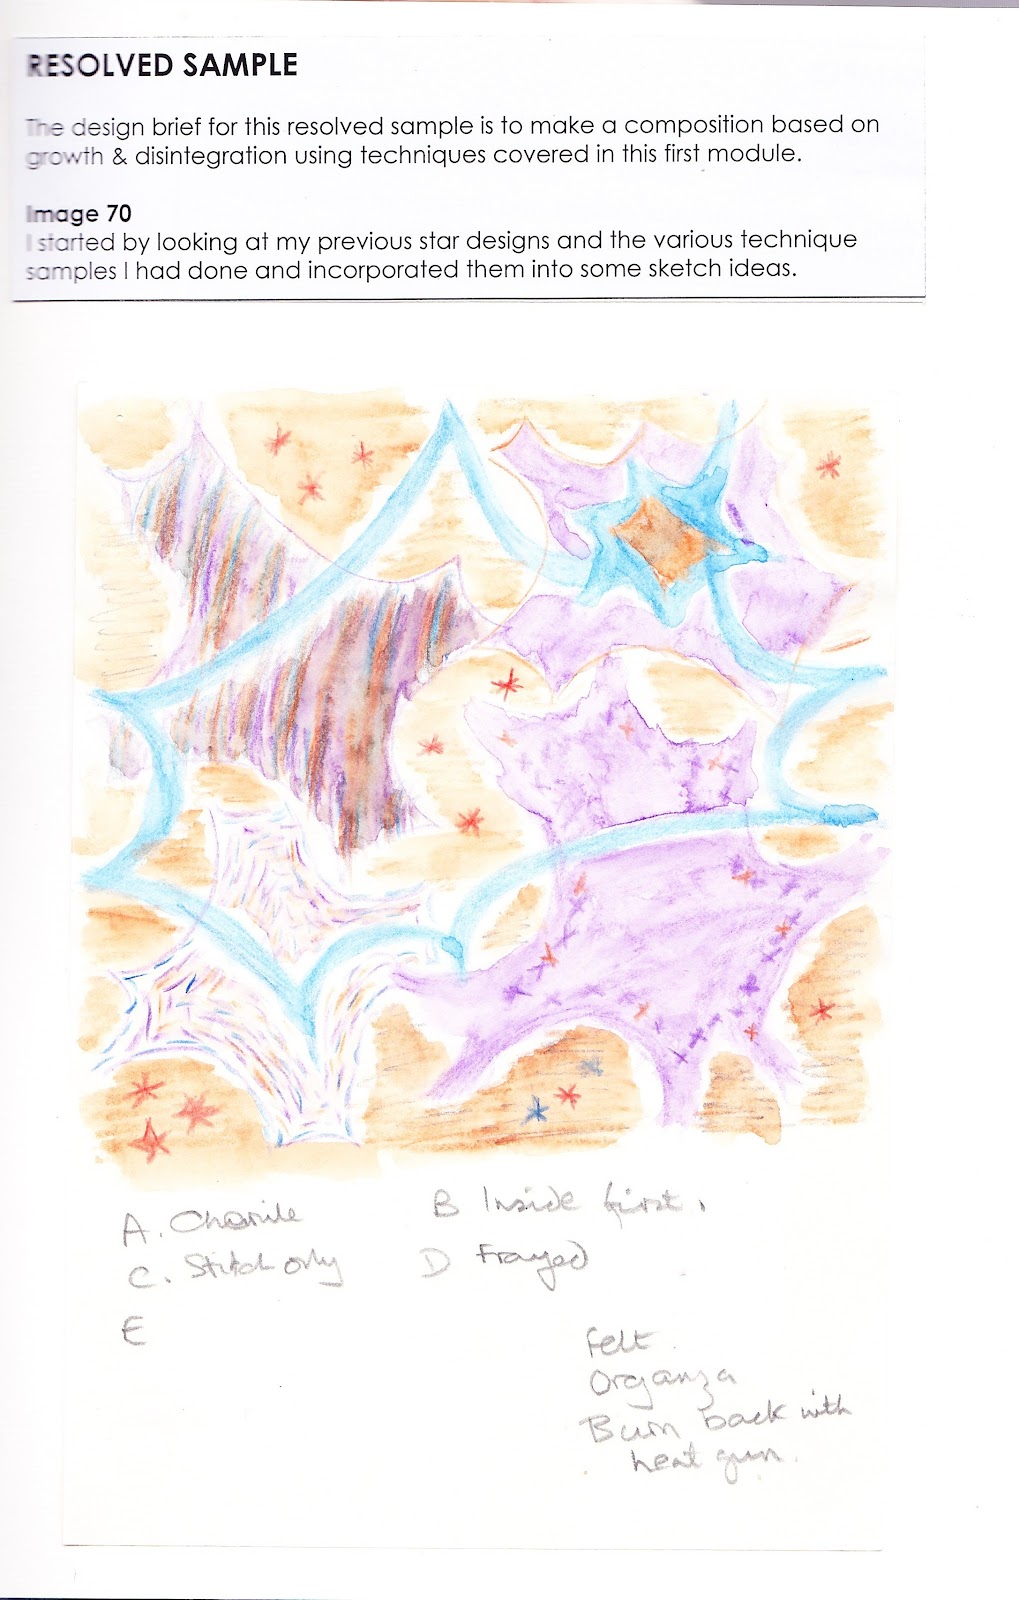 |
| My workbook - image 70 |
Chapter Eleven
 |
| My workbook - image 69 |
 |
| My workbook - image 68 |
 |
| My workbook - image 67 |
 |
| My workbook - image 66 |
 |
| My workbook - image 65 |
 |
| My workbook - image 64 |
 |
| My workbook - image 63 |
 |
| My workbook - image 62 |
 |
| My workbook - image 61 |
 |
| My workbook - image 60 |
 |
| My workbook - image 59 |
 |
| Composite Sheet |
Monday, 12 March 2012
Chapter Ten
 |
| Interchange sample 3 |
 |
| My workbook - image 58 |
 |
| Counterchange - sample 2 |
 |
| My workbook - image 57 |
This is a counter interchange sample using bonded felt. I was pleased with the outcome and loved the scrim and will certainly use it again. I don't particularly like the effect of the net by itself but it makes a good contrast when used with other finishes. Closed blanket stitch is another new stitch for me. Quite straight forward and I like the effect round the edge. I did wonder if I could possibly have done more hand stitching but decided against it.
 |
| My workbook - image 56 |
 |
| My workbook - image 55 |
Simple counterchange using papers.
 |
| My workbook - image 54 |
Chapter 10 starts with some insertion stitch samples. I tacked the strips of felt onto a piece of tissue paper and found there were a variety of possible stitches in my books. Most of these hand stitches are new to me so it has been great fun learning them. I started the bead inserting quite close together but after a few beads made the stitches wider which was more effective. There are a number of pattern stitches which I can use on my machine but they would not be wide enough to leave a gap.
Chapter Nine
 |
| My workbook - images 52 & 53 |
 |
| Second attempt at distressing this sample - image 51 |
 |
| My workbook - images 50 & 51 |
I used 5 layers for the sample in image 51 and, although they were all fraying materials the colours have not shown up here. I rubbed the finished sample to distress it but I wonder if the design was too detailed. When I have used this method before I have used straight lines or circles. Another possible idea would to have had the top layer in a different material. I pressed the sample down when scanning so it is possible this did not help either.
 |
| My workbook - images 48 & 49 |
I found myself heading for a symmetrical sample in image 48 so decided to make the final layer more random.
Saturday, 11 February 2012
Chapter Eight
 |
| My workbook - images 46 & 47 |
Oh dear, my display board is empty again so I need to get cracking with the next chapter.
 |
| My workbook - images 44 & 45 |
 |
| My workbook - images 42 & 43 |
Tuesday, 7 February 2012
Chapter Seven
 |
| My workbook - images 40 & 41 |
 |
| My workbook - images 38 & 39 |
 |
| My workbook - images 36 & 37 |
 |
| My new display board |
As suggested, I have just bought a displayboard and I must say it is a great idea. It enables you to keep all your current work in one place and great fun to pop into the workroom and look at your efforts. The only disadvantage is that when you complete a chapter and put everything in your workbook the display board is empty. On the other hand, you could say this is an advantage because it makes you start the next chapter quickly!
Wednesday, 25 January 2012
Chapter Six
 |
| My workbook - image 35 |
 |
| My workbook - image 34 |
 |
| My workbook - image 33 |
 |
| My workbook - image 32 |
 |
| My workbook - image 31 |
 |
| My workbook - images 25 -29 |
 |
| My workbook - images 22 & 23 |
Subscribe to:
Posts (Atom)