Wednesday, 25 January 2012

Chapter Six

My workbook - image 35
I wanted to have a go at incorporating everything in this chapter in a material sample but whilst I like the colours I have gone back to a symmetrical design.  I must get out of my comfort zone!
My workbook - image 34
I am pleased with this sample.  I used a mixture of silk threads, wool & glitz thread in no particular design before trapping them and the result was abstract.
My workbook - image 33
I am really pleased with the result of this sample.  Whilst the design shapes are symmetrical the addition of the scraps of coloured materials scattered at random makes it more interesting.
My workbook - image 32
Sponge coloured tissue paper.  I have tried to alter the shape of the design shape but this is back to symmetrical again!

My workbook - image 31
Again the design is not symmetrical.  Much better!  I was a bit disappointed that part of the painted bondaweb did not transfer but perhaps this was a good thing.
My workbook - images 25 -29
A selection of samples using bondaweb.  Some painted bondaweb cut into design shapes and ironed on background and some with threads, tissue paper or materials trapped between net, organza or scrim.  For painted bondaweb to show up well it is important to use correct background colour.  In image 26 the orange painted bondaweb does not show up but in image 29 the background is pale and the bondaweb is very clear.

My workbook - images 22 & 23
I was pleased with both of these samples.  I have been encouraged to explore designs which are not symmetric - it certainly makes them more interesting.

Friday, 13 January 2012

Chapter Five


Selection of printed materials 2 - Image 21
Selection of printed materials 1 - Image 20


Image 19
Image 18
Image 17

Selection of materials - cotton, silk, dupion, organza, glitz


Workbook - Image 16


Thursday, 5 January 2012

Chapter Four

My workbook - Image 15

My workbook - Image 14

My workbook - Image 13

My workbook - Image 12

My workbook - Image 11

I have really enjoyed this chapter.  I have tried to use images from my initial inspiration sheet and I am very pleased that I have been using my coloured papers and shall be going on to use some of these new designs in future chapters.

Tuesday, 3 January 2012

Chapter Three

Design Sheet C - Image 10
 
i Complex counterchange
ii Divide & separate
iii Pattern with new design unit – overlapped
iv New motif in repeat
v Rotational symmetry
vi Interlaced repeat motif

Design Sheet B - Image 9
i Scale
ii Pattern
iii Border & corner
iv Linking border
v Linking two different shapes
vi New shapes from old
a.    separated circle
b.    star
c.    separated octagon
d.    superimposed stars


Practice sample - Image 8


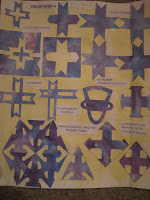
I used my initial design shape for Design sheet A but did not think there was sufficient change when put in the circle, diamond & triangle. Also I did not like the distorted image repeats so I decided to change and follow the image on the instruction sheet which you will see on the finished Design sheet A - Image 7a


Design Sheet A - Image 7a - photo


Shapes too large for A4 backing sheet so took photo.  Disappointed with photographic image - inserted scanned image which is missing some detail on right.


Design Sheet A - Image 7a
Scanned work but missing detail on right
Small image above shows everything

i Counterchange
ii Positive and negative
iii Symmetry
iv Asymmetry
v & vi Distortion
vii Repeat pattern


My workbook - Image 7

Chapter Two


Inked cartridge paper using Brusho powders - Image 6a
After reading feedback from tutor I bought some Brusho powders and watched the video on the Distant Stitch website.  The image above shows the results which I am much happier with.

Stars cut from inked paper - Image 6
I swapped the colours round this time and stuck orange onto blue.
Stars cut from inked paper - Image 5
The final task for this second chapter was to choose two plain complementary coloured sheets and cut star shapes from one and stick them onto the second.   I cut blue stars and stuck them on an orange background.  One star has been torn and several weaved together.  Some have had another shape on top.

Block printing - Image 4
Here is the second sheet of my block printing
Print 7 – block turned 45 degrees after each print and repeated to show negatives
Print 8 – block turned 180 degrees after each print – horizontal
Print 9 – block turned 45 degrees and then staggered
Print 10 – block turned 45 degrees to form star and extended further to make larger star
Print 11 – block overprinted
Print 12 – block turned and printed side by side

Block printing - Image 3
Here is the first sheet of my block printing
Print 1 – block printed side by side keeping the shape the same way up
Print 2 – block turned 45 degrees after each print
Print 3 – block printed to show random effect
Print 4 – gaps left between each shape
Print 5 – block turned 180 degrees after each print – vertical
Print 6 – block turned 45 degrees – different starting position


My second task was to cut a print shape from a rubber to use as a printing block. I used Daler Rowney Deep Violet Acrylic paint for this block printing.

My inked cartridge paper - Image 2
My first task for this chapter was to colour paper using inks.  I really enjoyed this activity as I had never done this before.  I bought myself a pack of sponges which were great, so easy to use and gave a super effect.  I used six different Winsor & Newton inks.
My workbook entry - Image 1