
Saturday, 27 February 2016
Chapter Twelve–completed
In my feedback it was suggested that I mount my resolved sample and I must say I am pleased with the result.


Tuesday, 23 February 2016
Chapter Twelve–part three
It is difficult to know when to stop but I think I am there!

I must say I have enjoyed creating this resolved sample. I really love the colours and I am pleased with my choice of stitch and manipulation.

I must say I have enjoyed creating this resolved sample. I really love the colours and I am pleased with my choice of stitch and manipulation.
It was difficult to decide whether to have gaps between the pieces or not so I took some photos and pinned them to my board. I hope I have made the right decision but I think I have! The frayed background I also like as I feel it is continuing the theme. I am pleased I was able to use some of the dyed cottons I made in the past because the subtle colours have worked well. I plan to mount the finished piece on black which I feels shows off the colours. As I said above, I think I have added sufficient stitch to merge the edges but I will wait for comments and my feedback. I could easily add more.


Friday, 12 February 2016
Chapter Twelve–part two
I have now completed my four pieces which, when assembled, will form my textured resolved sample. I gave myself a goal and have really enjoyed getting totally immersed in the work.
As Siân suggested, I used a variety of greys in my choice of material and threads and picked up the yellow from the bleached paper in my chosen design shape. Rummaging through my piles of dyed fabrics I came across some pieces that I prepared during module two when I was doing the black and white animal theme.


Images 12.14, 12,15, 12.16 & 12.17
As you can see I have wrapped 12.14 & 12.15 around some Vilene but the other pieces are self supporting and can be stitched to the background.
Below I have been experimenting with the background. Do I have a similar colour, do I have a completely different pale colour or a dark colour? Do I have the pieces close together or do I leave space between?


12.18 & 12.19
I do not have a large piece of the blue/grey material only small pieces however I thought it might be interesting to make a feature of this by joining them together with a running stitch using a contrasting thread.


12.20 & 12.21
This background is open weave and I have frayed the edges. I like the colour of this background and it gives good contrast but I am not convinced it is the right one to use. Another idea I had was to draw some threads from the background but not sure about that.


12.22 & 12.23
This background is some silk dupion I have but I think it is too white.

12.24
I really don’t like the black background so that has been eliminated already but it was interesting to see it.
At this point in time I think I favour having the pieces together using either the blue/grey or the open weave. Lots more decision to make but I am pleased with my progress. If any DS’s or friends look at this chapter I would welcome their comments!
As Siân suggested, I used a variety of greys in my choice of material and threads and picked up the yellow from the bleached paper in my chosen design shape. Rummaging through my piles of dyed fabrics I came across some pieces that I prepared during module two when I was doing the black and white animal theme.


Images 12.14, 12,15, 12.16 & 12.17
As you can see I have wrapped 12.14 & 12.15 around some Vilene but the other pieces are self supporting and can be stitched to the background.
Below I have been experimenting with the background. Do I have a similar colour, do I have a completely different pale colour or a dark colour? Do I have the pieces close together or do I leave space between?


12.18 & 12.19
I do not have a large piece of the blue/grey material only small pieces however I thought it might be interesting to make a feature of this by joining them together with a running stitch using a contrasting thread.


12.20 & 12.21
This background is open weave and I have frayed the edges. I like the colour of this background and it gives good contrast but I am not convinced it is the right one to use. Another idea I had was to draw some threads from the background but not sure about that.


12.22 & 12.23
This background is some silk dupion I have but I think it is too white.

12.24
I really don’t like the black background so that has been eliminated already but it was interesting to see it.
At this point in time I think I favour having the pieces together using either the blue/grey or the open weave. Lots more decision to make but I am pleased with my progress. If any DS’s or friends look at this chapter I would welcome their comments!
Saturday, 23 January 2016
Chapter Twelve
Joy, oh joy Open Live Writer - it worked a treat :-)

Image 12.1 – Butter muslin gathered in a wavy line with black crochet cotton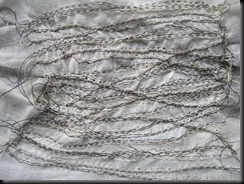
Image 12.2 – Butter muslin stitched with triple needle using black, cream and multi coloured thread.

Image 12.3 – Butter muslin stitched with wide double needle with wool trapped on reverse

Image 12.4 – Butter muslin stitched with vertical and horizontal pin tucks and then pressed open.
Hand stitching method

Image 12.5 – Chevron stitch worked on calico using embroidery thread, cotton thread, thick cotton thread, black and white crochet thread and beige knitting cotton.
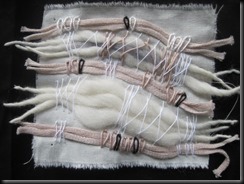
Image 12.6 – Fancy wool and cream ribbon couched on calico using Cretan and detached chain stitches.

Image 12.7 – Back stitch worked on calico and then woven loosely with black and white crochet cotton and beige knitting cotton.

Image 12.8 – Chain stitch worked on calico with a variety of sized stitches using white embroidery thread, black and white crochet thread and beige knitting thread.
Combined fabric manipulation plus hand stitching
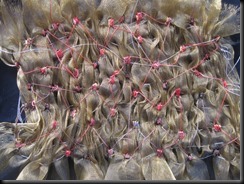
Image 12.9 – Satin stitch worked on gathered organza in a variety of embroidery thread colours .

Image 12.10 – Chevron stitched worked in a variety of sizes using white cotton, black and white crochet thread and beige knitting cotton on gathered butter muslin.

Image 12.11 – Pin tucks worked on white linen and fixed in place in opposite directions using feather stitch worked with varigated perle and black crochet cotton.

Image 12.12 – Chevron stitch using pale green and variegated perle on gathered grey organza layered with gold net.
As a reminder this is my chosen design shape

Using MS Publisher I have now experimented with three options – one using a plain background and the other with the double pintuck as a background. A gap would be left between each shape to show the background.


Option One and One a


Option Two and Two a


Option Three and Three a
Whether I use the plain background or the pintuck background I would work the four main shapes on Vilene and attach after giving a raised effect.
I really like the pintuck background because it joins the individual shapes together so my current favourite would be Option Two a.
I chose to create the samples using natural colours but I do wonder if I need to introduce some colour – if I used similar colours perhaps I could add some colour at a later date if necessary.
I like the mixture of fabrics, the soft butter muslin, the organza/net, the calico and the linen and hopefully as the butter muslin is pintucked horizontally and vertically it will be strong enough to support the individual shapes when they are attached.
Stitched trial samples for Resolved Sample
Fabric manipulation method
Image 12.1 – Butter muslin gathered in a wavy line with black crochet cotton

Image 12.2 – Butter muslin stitched with triple needle using black, cream and multi coloured thread.

Image 12.3 – Butter muslin stitched with wide double needle with wool trapped on reverse

Image 12.4 – Butter muslin stitched with vertical and horizontal pin tucks and then pressed open.
Hand stitching method

Image 12.5 – Chevron stitch worked on calico using embroidery thread, cotton thread, thick cotton thread, black and white crochet thread and beige knitting cotton.

Image 12.6 – Fancy wool and cream ribbon couched on calico using Cretan and detached chain stitches.

Image 12.7 – Back stitch worked on calico and then woven loosely with black and white crochet cotton and beige knitting cotton.

Image 12.8 – Chain stitch worked on calico with a variety of sized stitches using white embroidery thread, black and white crochet thread and beige knitting thread.
Combined fabric manipulation plus hand stitching

Image 12.9 – Satin stitch worked on gathered organza in a variety of embroidery thread colours .

Image 12.10 – Chevron stitched worked in a variety of sizes using white cotton, black and white crochet thread and beige knitting cotton on gathered butter muslin.

Image 12.11 – Pin tucks worked on white linen and fixed in place in opposite directions using feather stitch worked with varigated perle and black crochet cotton.

Image 12.12 – Chevron stitch using pale green and variegated perle on gathered grey organza layered with gold net.
As a reminder this is my chosen design shape

Using MS Publisher I have now experimented with three options – one using a plain background and the other with the double pintuck as a background. A gap would be left between each shape to show the background.


Option One and One a


Option Two and Two a


Option Three and Three a
Whether I use the plain background or the pintuck background I would work the four main shapes on Vilene and attach after giving a raised effect.
I really like the pintuck background because it joins the individual shapes together so my current favourite would be Option Two a.
I chose to create the samples using natural colours but I do wonder if I need to introduce some colour – if I used similar colours perhaps I could add some colour at a later date if necessary.
I like the mixture of fabrics, the soft butter muslin, the organza/net, the calico and the linen and hopefully as the butter muslin is pintucked horizontally and vertically it will be strong enough to support the individual shapes when they are attached.
Sunday, 10 January 2016
Chapter Ten
 |
| Image 10.1 |
 |
| Image 10.1.3 |
 |
| Image 10.1.4 |
 |
| Image 10.1.2 |
 |
| Image 10.2 |
 |
| Image 10.2.3 |
 |
| Image 10.2.4 |
 |
| Image 10.2.2 |
 |
| Image 10.3 |
 |
| Image 10.3.3 |
 |
| Image 10.3.4 |
 |
| Image 10.3.2 |
 |
| Image 10.4.1 |
 |
| Image 10.4.2 |
 |
| Image 10.4.4 |
 |
| Image 10.4.3 |
I chose four of my paper samples and put a piece of black
cotton on top. Using a white markel
stick I rubbed the image onto the fabric.
I may have put too much markel on so I turned the material over and was
very pleased that the marks had gone through leaving a more defined image
behind.
I used one of my favourite books, The Constance Howard Book
of Stitches as inspiration for my choice of stitch.
Chosen stitch
|
Chosen threads
|
Evaluation
|
|
10.1
|
Mixture of bullion knot, bullion knot with tail and French knots
|
Machine embroidery thread, cotton thread, cotton knitting thread,
cotton knitting ribbon
|
I chose this stitch because I could see a lot of heavy lines but
wanted a change from couching. I have
not used bullion knots very much in the past so this was good practice and I
was interested to find I was able to use quite thick threads and
ribbons.
|
10.2
|
Stem stitch and couching
|
Machine embroidery thread, cotton thread, cotton knitting thread,
cotton knitting ribbon and cotton bouclé
|
I chose this stitch because I wanted a linear effect. As in the previous sample I was interested
to see how I could use quite thick ribbons and threads. I used a tapestry needle and this made a
good sized hole for the thread to go through.
I used a variety of sizes of stitch.
|
10.3
|
Chevron stitch
|
Machine embroidery thread, cotton thread, cotton knitting thread,
cotton knitting ribbon and cotton bouclé
|
I chose this stitch because I could see a number of parallel lines on
the fabric and I like the effect achieved when using the different size of
stitch. I used a mixture of joined and
random chevron stitches. Again I used
a variety of threads and also tried weaving into the stitch.
|
10.4
|
Fly stitch
|
Machine embroidery thread, cotton thread, cotton knitting thread,
cotton knitting ribbon
|
I chose this stitch because I could see a lot of the Y shapes in the
rubbing. I used individual stitches in
a variety of threads and also some interlocking sets of stitches.
|
Subscribe to:
Posts (Atom)